
Sourdough bread baking have become a weekly routine ever since I started my naturally leaven bread journey a year ago. I will try to bake at least 2 loaves of the bread weekly for my family and every bake is a learning experience.
There are many health benefits that comes with consuming breads that are made with sourdough yeast and these healthy breads are full on flavour and texture. In the bread making process, the bread is given a long and slow fermentation process for the natural yeast to work through the grains to increase the flavour and texture of the bread, thus showcasing the flavour of the grains that it is made with.
 |
| Thin slice of the 50% whole wheat bread against the morning light |
The long fermentation process also reduce phytic acid, which is an anti-nutrient acid present in all grains, and allows the nutrients present in the grains be readily available to nourish our body. Sourdough breads also do not cause our blood sugar to spike as compared to bread made with commercial yeast. The process of baking sourdough bread is not a new. It dates back to Ancient Egyptian times. Moses time...

50% whole wheat sourdough bread is my latest bake. It is to allow more whole grain to be incorporated into our daily diet. You can find other sourdough recipes that I have made using ancient grains such as organic stone ground spelt and kamut flour. Though both are whole grain flours, kamut gave the bread a softer texture, both crust and crumb, compared to spelt. While spelt gave the bread a more distinct flavour and fragrance compared to kamut. This 50% whole wheat sourdough bread have a very distinct fragrance of caramelized grains with a moist and denser crumb compared to the above.
This 50% whole wheat sourdough bread will hold its fort when paired with strong flavored sandwich toppings such as smoked salmon, tuna or even better dipped into stews or curries. My favorite is to have it simply dipped into good, fresh extra virgin olive oil. Savoring the flavor of the grains with the spicy kick from the fresh olive oil.
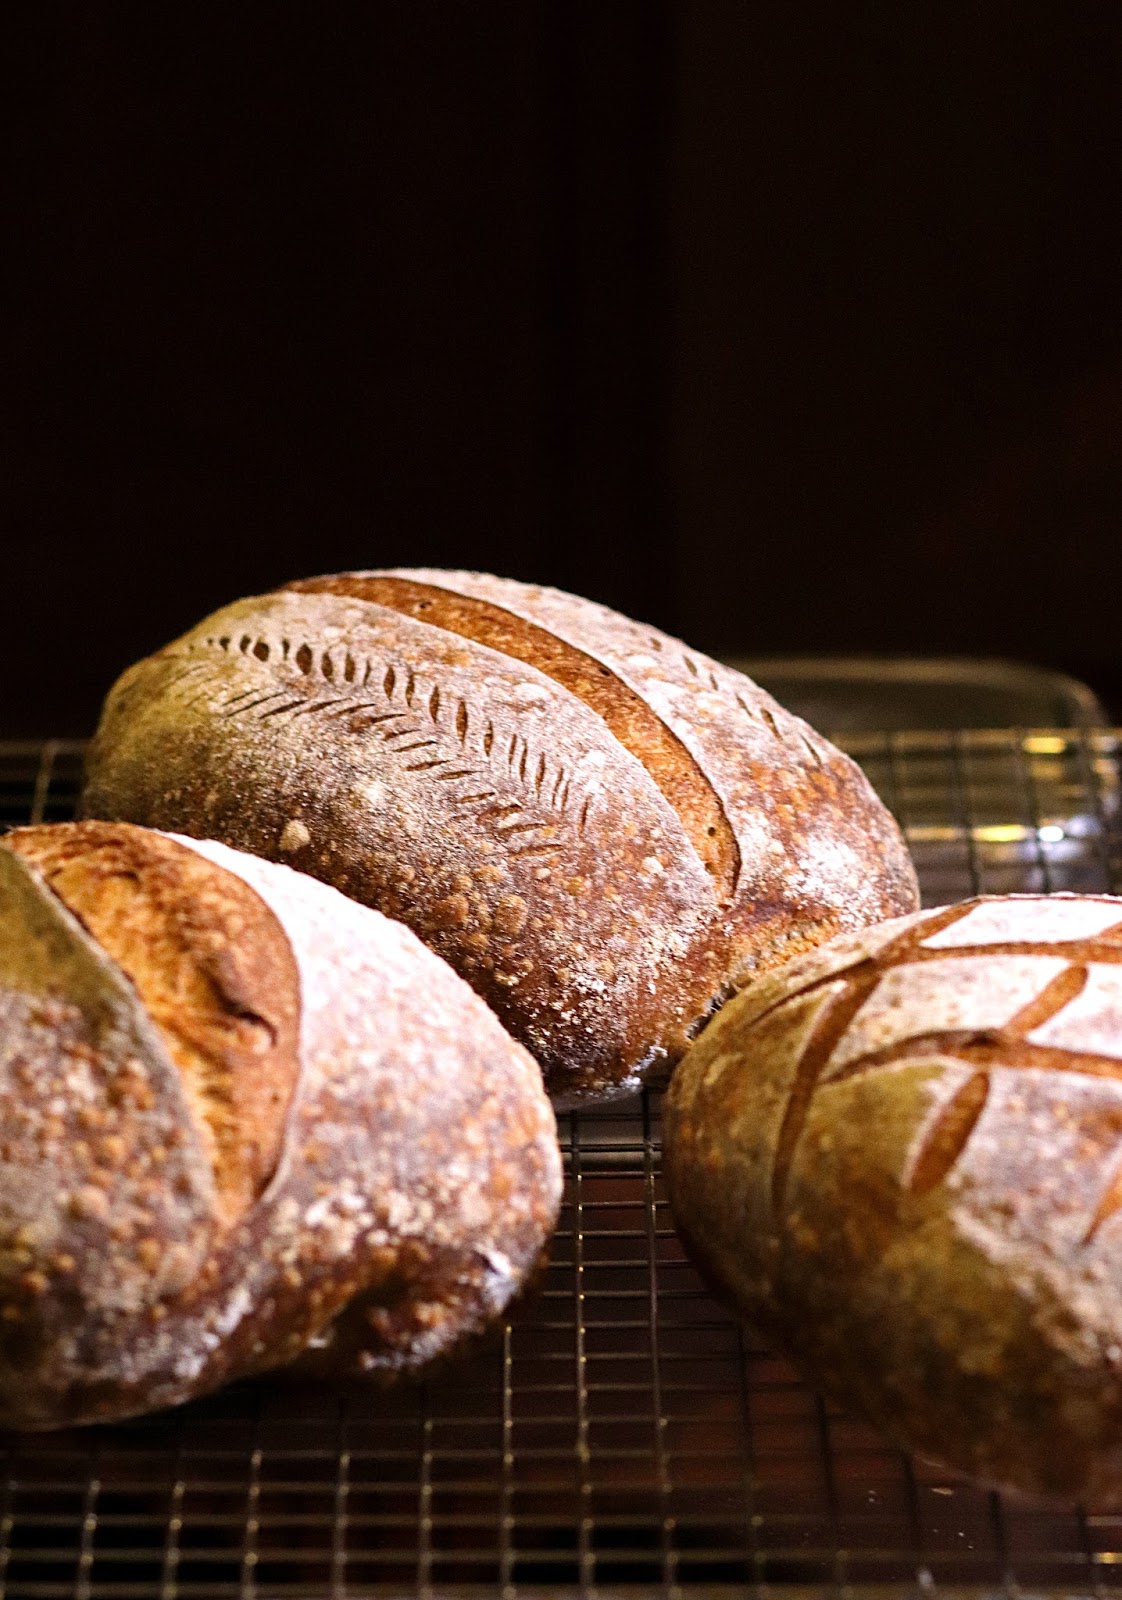
50% Whole Wheat Sourdough Bread
(makes 3 x 400g loaves)
Ingredients
381g organic whole wheat flour
381g organic hi protein flour (bread flour)
535g filtered water
17g sea salt
152g mature levain
Rice flour for dusting
Tools needed:
Bench scrapper
3 plastic containers (I used these found at IKEA)
3 lint free cloth (IKEA tea towel)
3 clear shower caps
Steps to sourdough bread:
The evening before:
- Take the sourdough yeast from the fridge and feed it with 80g of water and 80g of whole wheat flour. Let the mixture sit out in a cool environment over night on the counter top.
- Mix the flours, water and sea salt in a large mixing bowl until a shaggy dough is formed. Scrap down the sides of the bowl to incorporate the flour until no dry flour remains. Cover the bowl and place the mixing bowl into the fridge and leave it till the next day when you are ready to make bread.
The next day:
- Take the refrigerated dough out. Let it sit on counter top for 30 minutes.
- Measure out the required matured sourdough yeast (mature levain) from last evening and spread gently all over the refrigerated dough.
- Wet your hands before you proceed.
- Use your finger tips and dot the surface of the dough to start incorporating the yeast into the dough.
- Dividing the mixing bowl into North-South-East-West as though you are looking at the compass.
- Lift gently the dough on the West side of the bowl and fold it over to the East. Then lift the North side of the dough and fold it over the South side. Followed by lifting the West side and fold over the East and then the South side over onto the North. This is 1 complete cycle of folding (I like to call it the compass folding method). Repeat another 4 -5 more sets of folding and you will feel that the dough gaining strength and resisting the pull of your hand as you try to stretch it and it fold over. This process allows the yeast to be gently mixed into the dough and it also develop and align the gluten in the dough. Repeat the folding cycle as long as the dough allows you. Do not be forceful and tear the dough. This will destroy the gluten structure. Once you feel that the dough is resisting the fold, go to the next step.
- Cover the mixing bowl with a cling wrap or a clear shower cap (what I used) and let the dough sit for 30 minutes before you start another cycle of the compass folding. Do only 1 set of compass fold after every 30 minutes for a duration of 2 hours, which is to say a total of 4 sets of compass folds in 2 hours. Wet your hands before folding as it will help to prevent the dough from sticking to your hands as you grab it to fold it over.
- Observe and feel your dough throughout the 2 hours when you do the compass fold as it will feel less stick to your hands and start to hold its structure right after the folds.
- After 2 hours, divide the dough into 3 equal portions and round them and let them rest for 10 - 15 minutes on the counter top covered with a damp cloth before shaping them.
- After resting for 10 - 15 minutes, using a bench scrapper and dust the work surface with a little rice flour, turn the dough over the dusted surface and gently stretch it out into a square. Be gentle as you do not want to burst the precious bubbles that the yeast have made in the dough. Fold the bottom end of the dough 2/3 way onto itself and the top end over to form an letter fold. Dust the surface or the dough with rice flour if it is sticking to the counter top or your hand. Then turn the lettered fold dough 90 degrees and roll the dough as though making a swiss roll cake. Using the bench scrapper lift the dough and place the dough into a longish container (I used this container that can be found at IKEA) lined with a lint free cloth dusted with a generous amount of rice flour, bottom side up. Cover the dough with the overhang of the tea towel and cover the container with a clear shower cap. Do the same for the other 2 dough and place them in the fridge to bulk ferment for at least 10 hours. You can line ceramic bowls with tea towels to create the vessels for the bulk fermentation, just make sure that they are at least 1.5 to 2 times bigger than the newly formed dough.
- When the dough is ready to be baked, preheat oven to 300 degrees C (500 F) for 1 hour. Place a enamel pot and a pizza stone into the oven as it is preheating. This will be the baking vessel that will hold in the steam generated from the bread while it is baking to create the thin crust on the bread.
- Be very careful at this stage, everything is extremely HOT. Use a pair of thick oven gloves to protect your hands.
- Once the oven is preheated, turn your bread onto a pizza peel (I used the removal base of a tart pan) lined with baking paper. Use a sharp knife or a lame (if you own one) to score the surface of the dough. Very carefully remove the enamel pot from the oven. Slid the dough with the baking paper onto the pizza stone. Cover the dough with the turned over enamel pot and bake for 25 minutes.

- After 25 minutes, open the oven carefully (hot steam will rush out from the oven) and remove the enamel pot leaving the bread on the pizza stone and reduce the temperature to 220 degrees C (425 F) and let the bread bake for another 10 minutes or till golden brown.
- Once baked, transfer the bread very carefully to an elevated cooling rack to cool for at least 1 hour.
- Return the enamel pot into the oven and increase temperature to 300 degree (500F) and let it preheat for 10 minutes before you proceed with the second and third loaf.
Share the recipe:
or
Instagram: incookiehaven
No comments:
Post a Comment